Construction equipment management is how a contractor keeps track of every machine and tool across its sites: where it is, who is running it, how many hours it worked, what it costs and when it is due for service. On a typical site that means a mix of company-owned backhoe loaders and mixers, hired cranes billed by the hour or month, and hundreds of small tools moving between projects. This guide shows how to set up an equipment register, measure utilisation, decide whether to rent or buy, plan maintenance, stay compliant and know when a machine is ready to retire.
What is construction equipment management?
It covers the full life of every asset on your books or on hire, from the day it reaches site to the day it is sold, scrapped or returned to the vendor. In practice it answers five questions every day: what do we have, where is it, is it working or idle, is it safe and serviced, and what is it costing us.
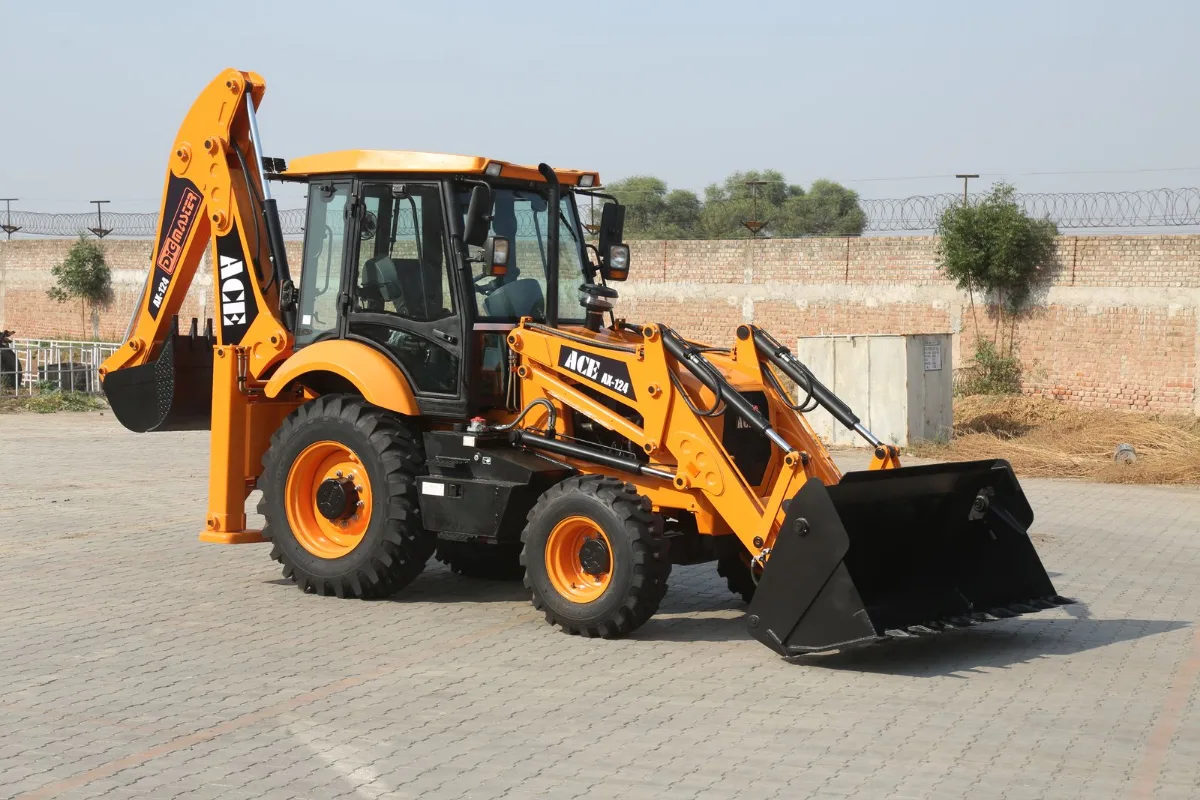
It applies to heavy machinery such as excavators, backhoe loaders, cranes, transit mixers, concrete pumps, batching plants, DG sets and compactors. It also applies to the long tail of smaller equipment: bar benders and cutters, needle vibrators, welding sets, scaffolding and shuttering. These go missing far more often than a crane does, and the same discipline applies to stores and stock, covered in our guide to construction warehouse management.
Where equipment quietly drains your margin
Equipment rarely sinks a project in one dramatic moment. The losses are small, daily and easy to miss:
| Leak | What it looks like on site | What fixes it |
|---|---|---|
| Idle rentals | A hired machine stands for days between tasks while the rental clock keeps running | A daily usage log and a return date for every hired machine |
| Breakdowns at the worst time | A mixer or pump fails halfway through a pour | Preventive maintenance based on running hours, not memory |
| Unrecorded hours and fuel | Operator hours and diesel are noted on paper, if at all | Hour-meter readings and fuel issued, logged every shift |
| Missing small tools | Vibrators, cutters and shuttering disappear between sites | An asset ID and a named custodian for every item |
| Wrong machine for the job | An oversized machine does work a smaller one could handle | Matching equipment to planned tasks in advance |
| Disputes with hire vendors | Your hours and the vendor's hours do not match at month end | Shared daily logs, signed by both sides |
Each of these is a process problem before it is a machine problem, which is why the fix starts with a register.
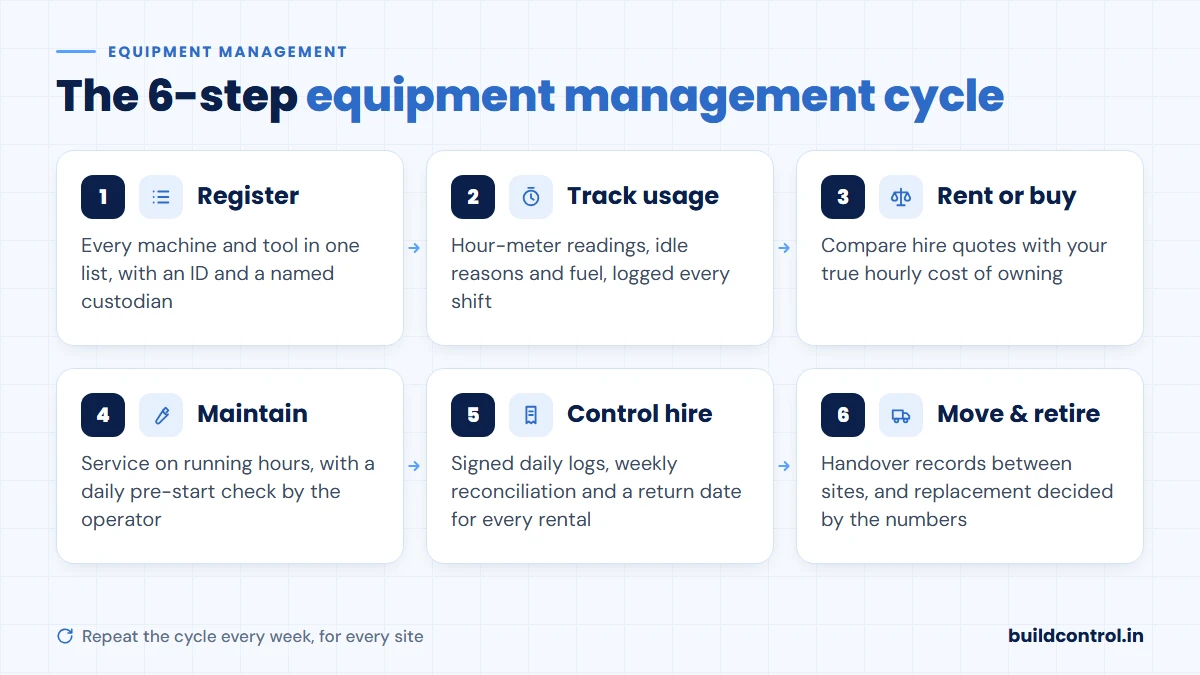
Step 1: Build an equipment register
A register is one list of every machine and tool, owned or hired, with enough detail to identify, locate and cost it. Keep a single register for all sites. Separate spreadsheets for each project are exactly where machines get lost.
| Field | Why it matters |
|---|---|
| Asset ID | A short unique code painted or tagged on the machine, so everyone refers to it the same way |
| Type, make and model | Needed for spares, service intervals and choosing the right machine for a task |
| Serial or chassis number | Proves ownership and helps recover a stolen machine |
| Owned or hired | Hired items also need the vendor, rate, billing basis (hour, day or month) and agreed return date |
| Current site and custodian | Who is responsible for the machine today |
| Operator | The trained person authorised to run it |
| Hour-meter or odometer reading | The basis for usage, fuel checks and service intervals |
| Next service due | In hours or by date, whichever comes first |
| Documents | Insurance, inspection or test certificates, with their expiry dates |
Small tools do not need every field, but they do need an ID and a custodian. A tool that belongs to "the site" belongs to nobody.
Step 2: Track usage and utilisation
Once every machine has an ID, record what it actually does. One short entry per machine per day is enough: the start and end hour-meter reading, hours worked, hours idle with a reason (no operator, no work front ready, breakdown, weather), fuel issued and the task it was used for.
Those entries give you utilisation, the single most useful number in equipment management:
Utilisation (%) = hours actually worked ÷ hours the machine was available × 100
For example, a backhoe loader is available for a 10 hour shift on 26 days in a month, which is 260 available hours. The log shows it worked 156 hours, so its utilisation is 156 ÷ 260 × 100 = 60%.
Low utilisation on a hired machine means you are paying for it to stand. Low utilisation on an owned machine spreads its fixed costs over too few hours, which makes every working hour more expensive, as the worked example below shows. Review the figure every week for each machine and ask why the idle hours happened. The reasons usually point to a planning problem rather than an equipment one.
Fuel is the second check. Divide fuel issued by hours worked to get litres per hour for each machine. If a machine suddenly burns far more than its usual rate, look for a fault, a logging error or pilferage.
Step 3: Decide whether to rent or buy
There is no universal answer, but the decision becomes clear once you know how many hours a machine will really work for you.
| Rent when | Buy when |
|---|---|
| You need the machine for one phase or a short window | You can keep it busy on most working days, across projects |
| It is a specialist machine you rarely use | It is a workhorse your sites ask for every week |
| Your pipeline of projects is uncertain | You have steady work and can plan its movement between sites |
| You do not want to carry maintenance, operators and storage | You have the people and the yard to maintain it properly |
To compare the two fairly, work out what one hour of an owned machine really costs you.
Worked example: the true hourly cost of an owned machine
The figures below are illustrative and work in any currency: they only show the method. Replace them with your own purchase price, finance terms, fuel rate and operator wages.
| Cost item | Per year |
|---|---|
| Depreciation: bought for 90,000, sold after 6 years for 27,000 | 10,500 |
| Finance and insurance | 6,000 |
| Maintenance and repairs | 4,500 |
| Operator wages (3,000 a month) | 36,000 |
| Total fixed cost | 57,000 |
Fuel is a running cost on top: 5 litres an hour at 1.20 a litre adds 6.00 for every hour worked.
- At 1,800 working hours a year: fixed cost is 57,000 ÷ 1,800, about 31.67 an hour. With fuel, the true cost is about 37.67 an hour.
- At 900 working hours a year: fixed cost doubles to about 63.33 an hour, and the true cost rises to about 69.33 an hour.
Now compare local hire quotes on the same basis, with or without operator and fuel. If a comparable machine can be hired for less than your true cost at the hours you can realistically expect, renting is the better deal. If you charge the machine to a client or another project, add your margin to the true cost, not just to fuel and wages.
Step 4: Plan preventive maintenance
Most breakdowns give notice in advance: a leak, a new noise, a warning light or an overdue service. Preventive maintenance means acting on those signals on a schedule instead of waiting for the machine to stop. Base intervals on the manufacturer's manual and on running hours, because a machine working double shifts reaches its service interval much sooner than the calendar suggests.
| When | Typical checks |
|---|---|
| Every shift, by the operator | Walk-around for leaks and damage; engine oil, coolant and hydraulic levels; tyres or tracks; lights, horn and reversing alarm; brakes and seat belt |
| Weekly | Greasing of pins and bushes; air filter condition; battery and terminals; hoses and fittings; tyre or track wear |
| Every service interval, by running hours | Engine oil and filter change; fuel and hydraulic filters; belts; a detailed inspection by a mechanic, as set out in the manual |
| Before and after every site transfer | A full condition check with photos, so any damage is recorded against the right site |
Record every service and repair against the machine's ID. Within a year that history shows which machines are reliable, which are expensive to keep, and which sites treat equipment roughly.
Daily pre-start checklist for site teams
- The machine ID matches the register and the operator is authorised to run it
- No fluid leaks under the machine; oil, coolant and hydraulic levels are correct
- Tyres or tracks, bucket, boom and attachments show no cracks or loose pins
- Lights, horn, reversing alarm, mirrors and brakes all work
- Seat belt and guards are in place, and cabin glass is clean and intact
- The fire extinguisher, where fitted, is charged
- The hour-meter reading is noted before work starts
- The work area is checked for overhead lines, soft ground and people in the swing radius
Safety and compliance
Every country sets its own rules for construction equipment, but they cover the same ground: lifting gear examined by a competent person, trained and fit operators, and records you can show an inspector. A few examples:
- United States: OSHA’s cranes and derricks in construction standard (29 CFR 1926 Subpart CC) sets inspection and operator certification rules.
- United Kingdom: the Lifting Operations and Lifting Equipment Regulations 1998 (LOLER) require lifting equipment to be thoroughly examined before first use and at regular intervals.
- India: since 21 November 2025, construction worker safety falls under the Occupational Safety, Health and Working Conditions Code, 2020, which brought the Building and Other Construction Workers Act, 1996 under one code.
Rules change and often vary by state or region, so confirm the current requirements for your location with your safety officer.
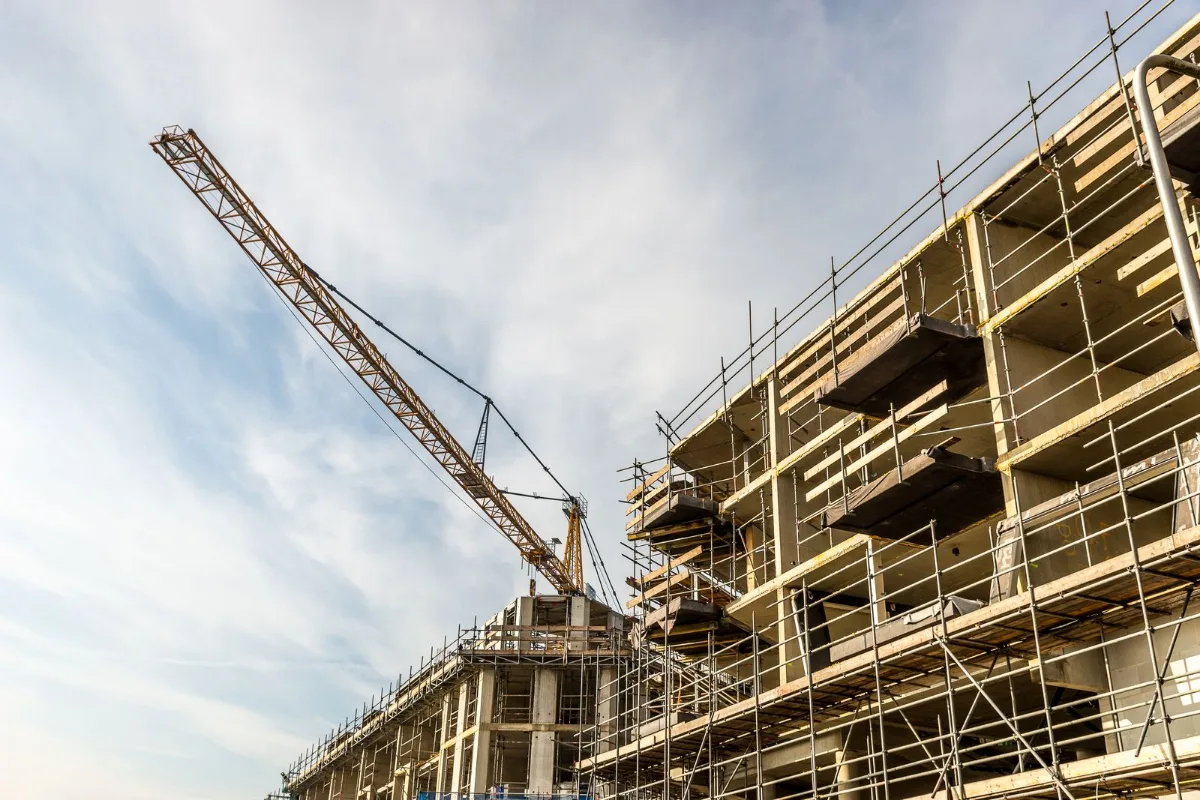
The common baseline across these rules: cranes, hoists and their lifting gear are tested and examined by a competent person before first use and after any alteration or repair, and operators are trained to understand the risks of the equipment they run. On top of the legal minimum, good practice on site includes:
- Marking the safe working load on every lifting appliance and never exceeding it
- Using a trained signaller to guide lifts and reversing machines
- Keeping people out of swing radii and blind spots with barricades
- Making sure everyone near equipment wears helmets, safety shoes and high-visibility jackets, with ear protection where needed
Keep inspection certificates, insurance and operator training records with each machine in the register, together with their expiry dates, so nothing lapses unnoticed.
Step 5: Keep hired equipment under control
Hired machines are often the biggest equipment cost on a project, and the easiest to lose control of, because the vendor's meter runs whether or not your site is ready.
- Agree the billing basis in writing before the machine arrives: per hour, day or month, minimum billable hours, how breakdown time is treated, and who pays for fuel, operator and transport.
- Record the hour-meter reading and take photos at check-in and check-out, signed by your supervisor and the vendor's operator.
- Log hours daily and reconcile them with the vendor every week, not at month end when memories have faded.
- Set a planned return date for every hired machine and review it in the weekly site meeting.
- Release machines as soon as their work is done. Every idle day after that is pure cost.
Step 6: Move equipment between sites with a record
Machines and tools travel between projects all the time, and transfers are where records usually break. Treat every move as a handover: note the date, the hour-meter reading, the condition with photos, who dispatched it and who received it. The register then shows the new site and custodian, and usage and cost are charged to the right project from the day the machine arrived.
When to repair and when to retire a machine
Every machine reaches a point where keeping it costs more than replacing it. The signs usually build up over months:
- Breakdowns are becoming more frequent, and each one costs more than the last
- Yearly repair spending is approaching what the machine earns for you in the same period
- Spare parts are hard to find or take weeks to arrive
- Fuel use per hour has crept well above the machine's usual rate
- It no longer meets the safety or emission standards your clients and sites require
- It is too small or too slow for the projects you now take on
Your maintenance history turns this into a decision based on numbers. Compare the last 12 months of repair and downtime cost with the cost of hiring or buying a replacement, and plan the sale while the machine still has resale value.
How buildcontrol helps you manage equipment
buildcontrol's equipment management module brings the steps above into one app shared by the office and every site:
- Equipment register: every machine, owned or rented, in one list with its site, operator and current status.
- Usage and idle tracking: running hours logged against each machine, so you can see what is working and what is standing idle.
- Rental cost control: rental periods and rates tracked and fed into payment tracking, so you catch machines you are paying for but not using.
- Maintenance scheduling: service intervals per machine, so upcoming maintenance is visible before it turns into a breakdown.
- Site-to-site transfers: a clear record of where each machine went and when, with usage and cost staying with the right project.
- Operator assignment: who is responsible for each machine on any given day.
Because equipment sits next to attendance, materials, payments and daily site reports in the same app, its cost shows up in each project's overall picture instead of a separate spreadsheet. If you are comparing tools, read how owners choose a construction equipment management app and why every company needs equipment management software.
Frequently asked questions
What is construction equipment management?
It is the process of tracking every machine and tool a contractor owns or hires: where it is, who operates it, how many hours it works, what it costs and when it needs service, from purchase or hire until it is sold, scrapped or returned.
How do I calculate equipment utilisation?
Divide the hours a machine actually worked by the hours it was available, then multiply by 100. A machine available for 260 hours in a month that worked 156 hours has a utilisation of 60%.
Is it better to rent or buy construction equipment?
Buy machines you can keep busy on most working days across projects. Rent specialist machines, short-term needs and anything you cannot keep busy. Compare hire quotes with the true hourly cost of owning, including depreciation, finance, insurance, maintenance, operator wages and fuel.
How often should construction equipment be serviced?
Follow the manufacturer's service intervals, which are usually set in running hours, and add daily operator checks plus weekly greasing and inspections. Machines working double shifts reach their service intervals much sooner than the calendar suggests.
Which laws cover construction equipment safety?
It depends on the country, but most rules require lifting equipment to be examined by a competent person and operators to be trained. Examples include OSHA’s 29 CFR 1926 Subpart CC for cranes in construction in the United States, LOLER 1998 in the United Kingdom and the Occupational Safety, Health and Working Conditions Code, 2020 in India. Check the current rules for your location with your safety officer.
Can buildcontrol track both rented and owned equipment?
Yes. Each machine is tagged as owned or rented, and rented machines carry their rental period and rate, so you can track hire cost separately from your own fleet.
Conclusion
Good equipment management does not start with expensive telematics. It starts with a complete register, honest daily usage logs, maintenance planned on running hours and tight control of hired machines. Once those basics are in place, the numbers tell you which machines earn their keep, which ones to send back, and when to replace them.
See buildcontrol on your own sites
Book a free demo and we will walk you through it on your projects.
Book a free demo